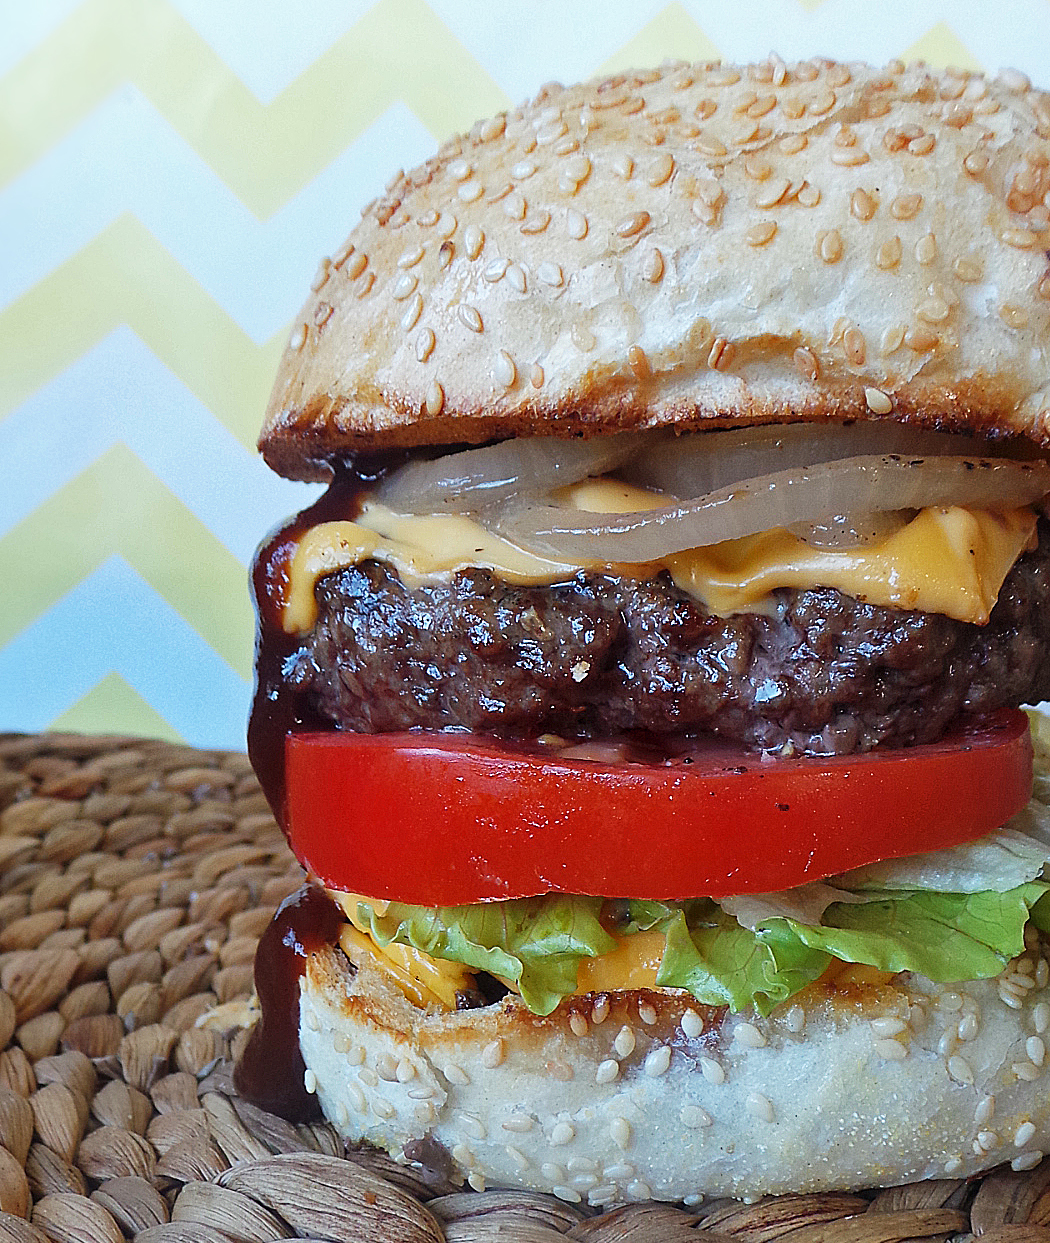
Hopefully after this post you’ll be craving a big fat juicy burger because then you’ll get a glimpse of how I feel every single day. There are few foods that I call weaknesses and cheeseburgers are one of them. When I think burger, I don’t think whimpy. My burgers are piled high with fresh or fried toppings, fun condiments, and of course buttery toasted buns. Once you’ve nailed a few basic tips, you’ll soon construct a beyond basic burger. The tips are simple and aren’t something buried in your favorite restaurant’s recipe binder. I’m going to deconstruct this burger and show you simple tips and toppings that will turn your cookout into a five star dining experience.
It all starts with the meat and today we’re strictly focusing on beef. Of course the fresher the better, but chances are you don’t have a meat grinder and don’t feel like going through the hassle, so make your first stop to your favorite butcher. Find your area’s best and try to avoid that grocery store with the weak meat selection because we all know we have one of those. The most flavorful is ground chuck, but try and focus on the fat content. All you have to remember is 80/20, which means 80% lean and 20% fat. I’ll go into greater detail later, but the higher the fat, the juicer and tastier the burger.
I’m all about creative and flavor and preference, so if you insist on adding breadcrumbs and eggs to your burger I am not stopping you nor telling you it won’t be good – HOWEVER, in the nicest way possible we’re not making meatloaf so if it’s not the way you usually do it, don’t! Since you did spend an extra buck on a nice cut of ground beef, you want to taste it…right? I wait until the patties hit the grill to add the seasonings which is nothing more than salt and pepper. We’ll get to that. Plus adding in the extra yums means you have to mix the meat and that can risk overworking and creating a tough burger.
The general rule is 1 1/2 pounds of meat will make four rough 6 oz. burgers. I divide my meat into four then loosely cup the meat while forming into a patty all at once. You want to treat it like it’s special because it is.
I then use my thumb to create an indent in the center of the patty. Basically this tricks the burger into cooking evenly and prevent it from puffing up. After being handled in room temperature, the meat likes to take a little break. I slide mine into the fridge for thirty minutes before grilling. I’ve also heard that this helps to absorb the seasonings a little better. While you’re patiently waiting, this is the perfect time to ready those toppings.
My favorite toppings are grilled onions, plump tomato slices, crisp ice burg lettuce, barbecue sauce, and of course those toasty buns. To grill onions, slice them into rings, toss in oil, sprinkle with salt and pepper, then wrap in foil and toss on the grill for 10 minutes. You can also fry them, caramelize them, or cook them in red wine. The options are endless so have some fun and get creative!
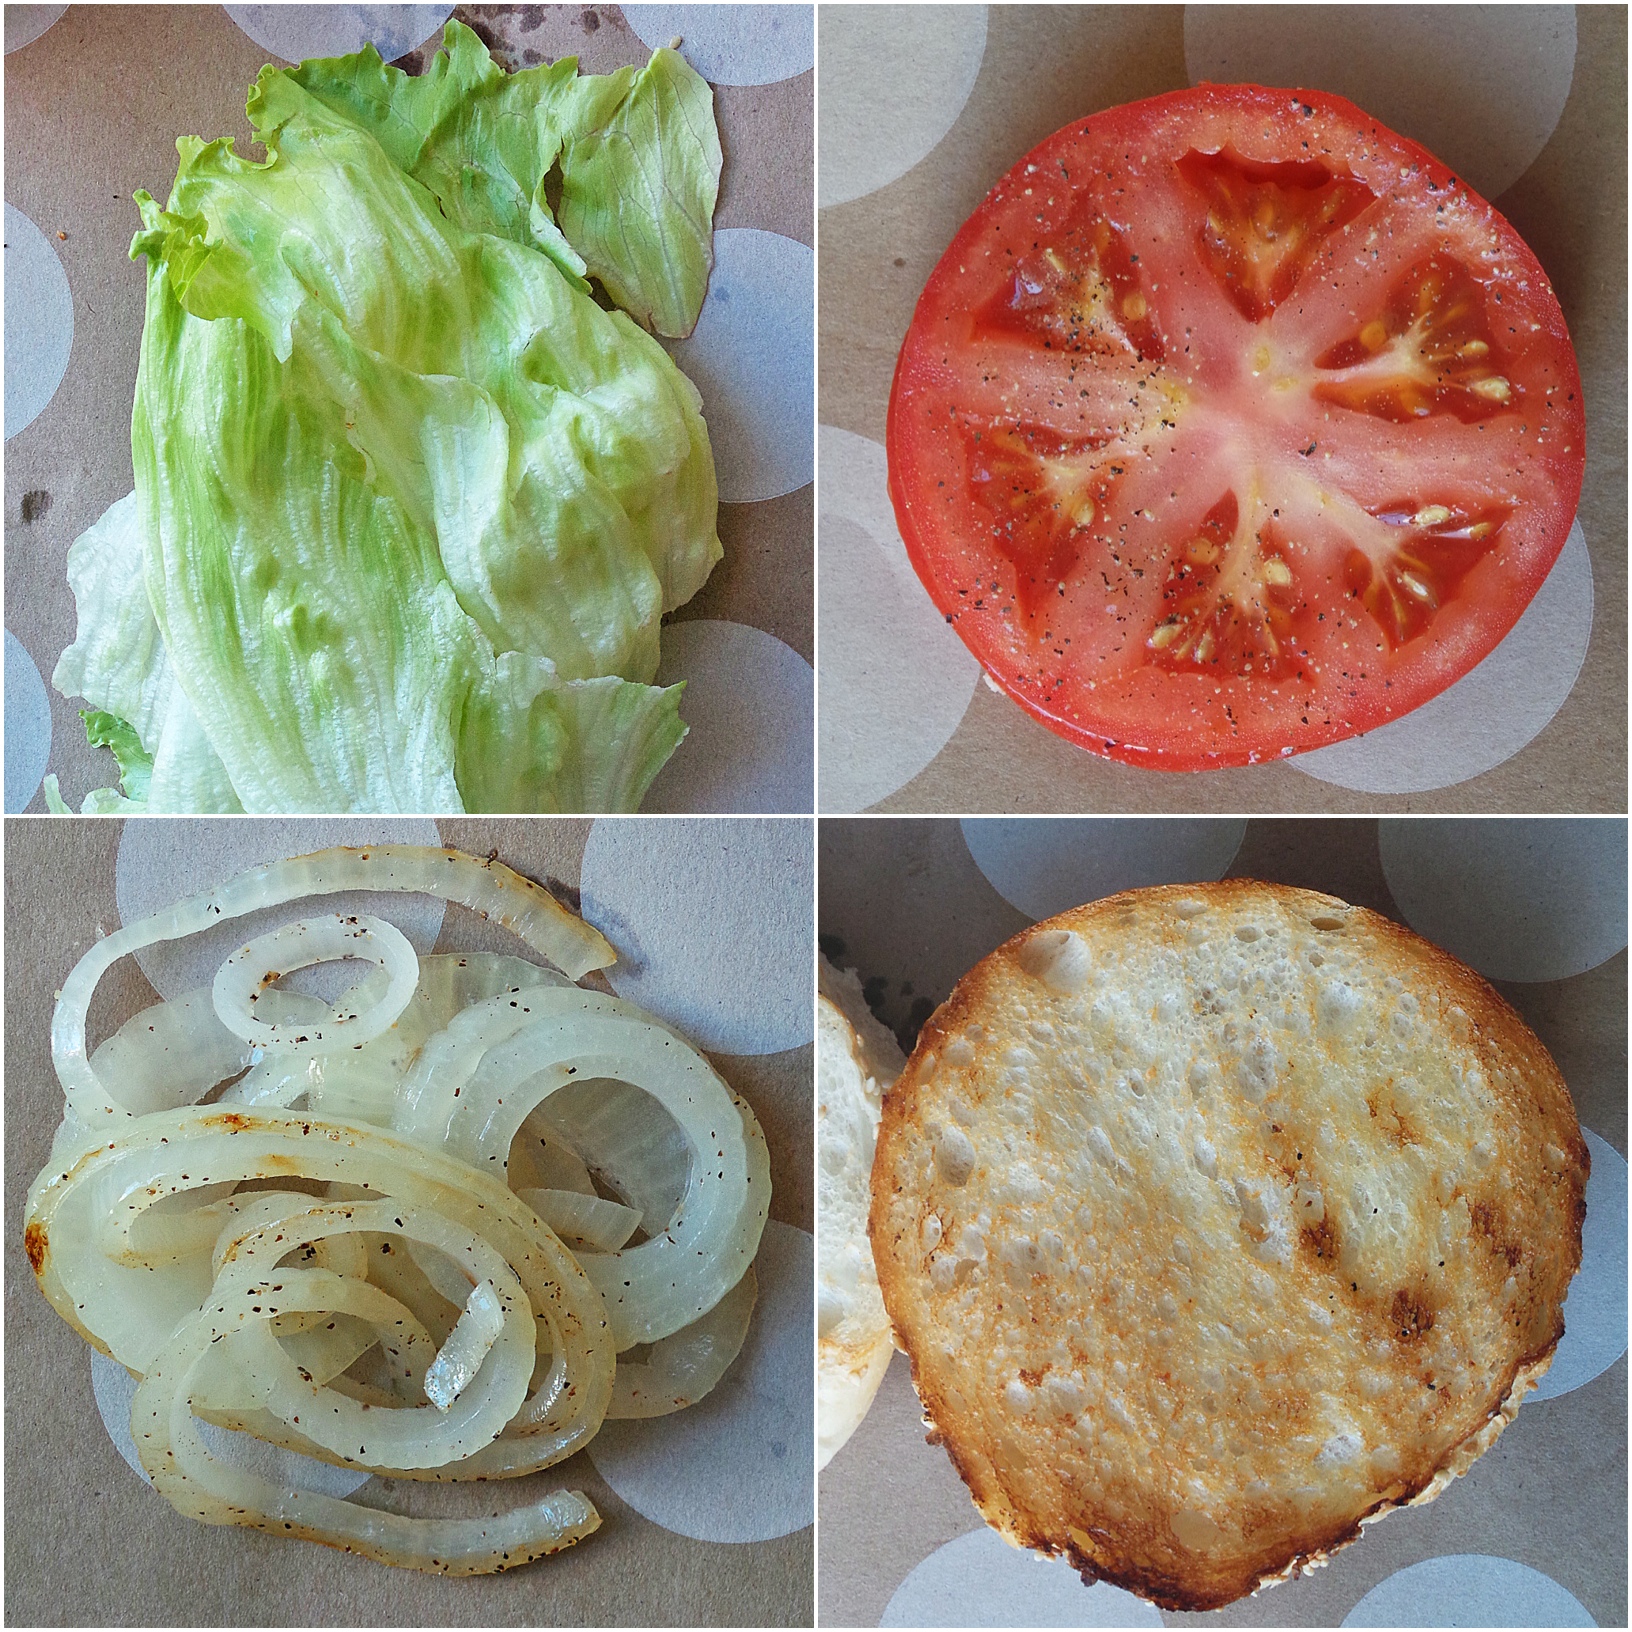 Of course ketchup will never let you down, but have some fun with it by adding in chipotle or jalapenos. Heck make a chipotle ranch dressing and invite me over because I need that. As for the cheese, I like using simple cheddar cheese slices. If you know you’re making 4-5 burgers, ask your deli for a few slices of a variety of cheese and experiment! That’ll also save you a few bucks from buying cheese in bulk. The fixings are meant to compliment the burger and making the eating experience fun. Am I the only one who has fun eating a burger?
Plain and simple, find your area’s biggest buns. Sounds like an ad we’ve all seen pop up, right? Get your mind out of the gutter and start focusing on the bread because this not only holds your burger together, this plays a key role into each bite. With the best toasted buns, your burger can go from a 9 to a 10.
If I’m only grilling for a few people, I go to my bakery’s bread box and pick out 3-4 buns for less than a dollar. Between that and the cheese trick, you can really save some bones! As for toasting, I melt two tablespoons of butter and depending if I have garlic or not, I’ll add minced garlic or a sprinkle of garlic powder. Once your buns are cut, brush em’ with the butter and toast on the grill for 2-3 minutes. Speaking of grilling, those patties have probably been chilling for 30 minutes now so IT IS TIME…
This is probably the easiest part because you literally do nothing. That’s the best tip: do nothing! As the grill is heating up I get together my “burger board”
I have my patties, salt and pepper, oil, and brush all ready for me. That means once my grill is hot, all I have to do is oil/season/place. The trick to telling if your grill is ready is holding your hand about 6″ above the flame and counting “three Mississippis”. If you scream and scorch, it’s ready! Just kidding, don’t hurt yourself. Once you place your burgers on the grill, close it and don’t do anything for 3-4 minutes.
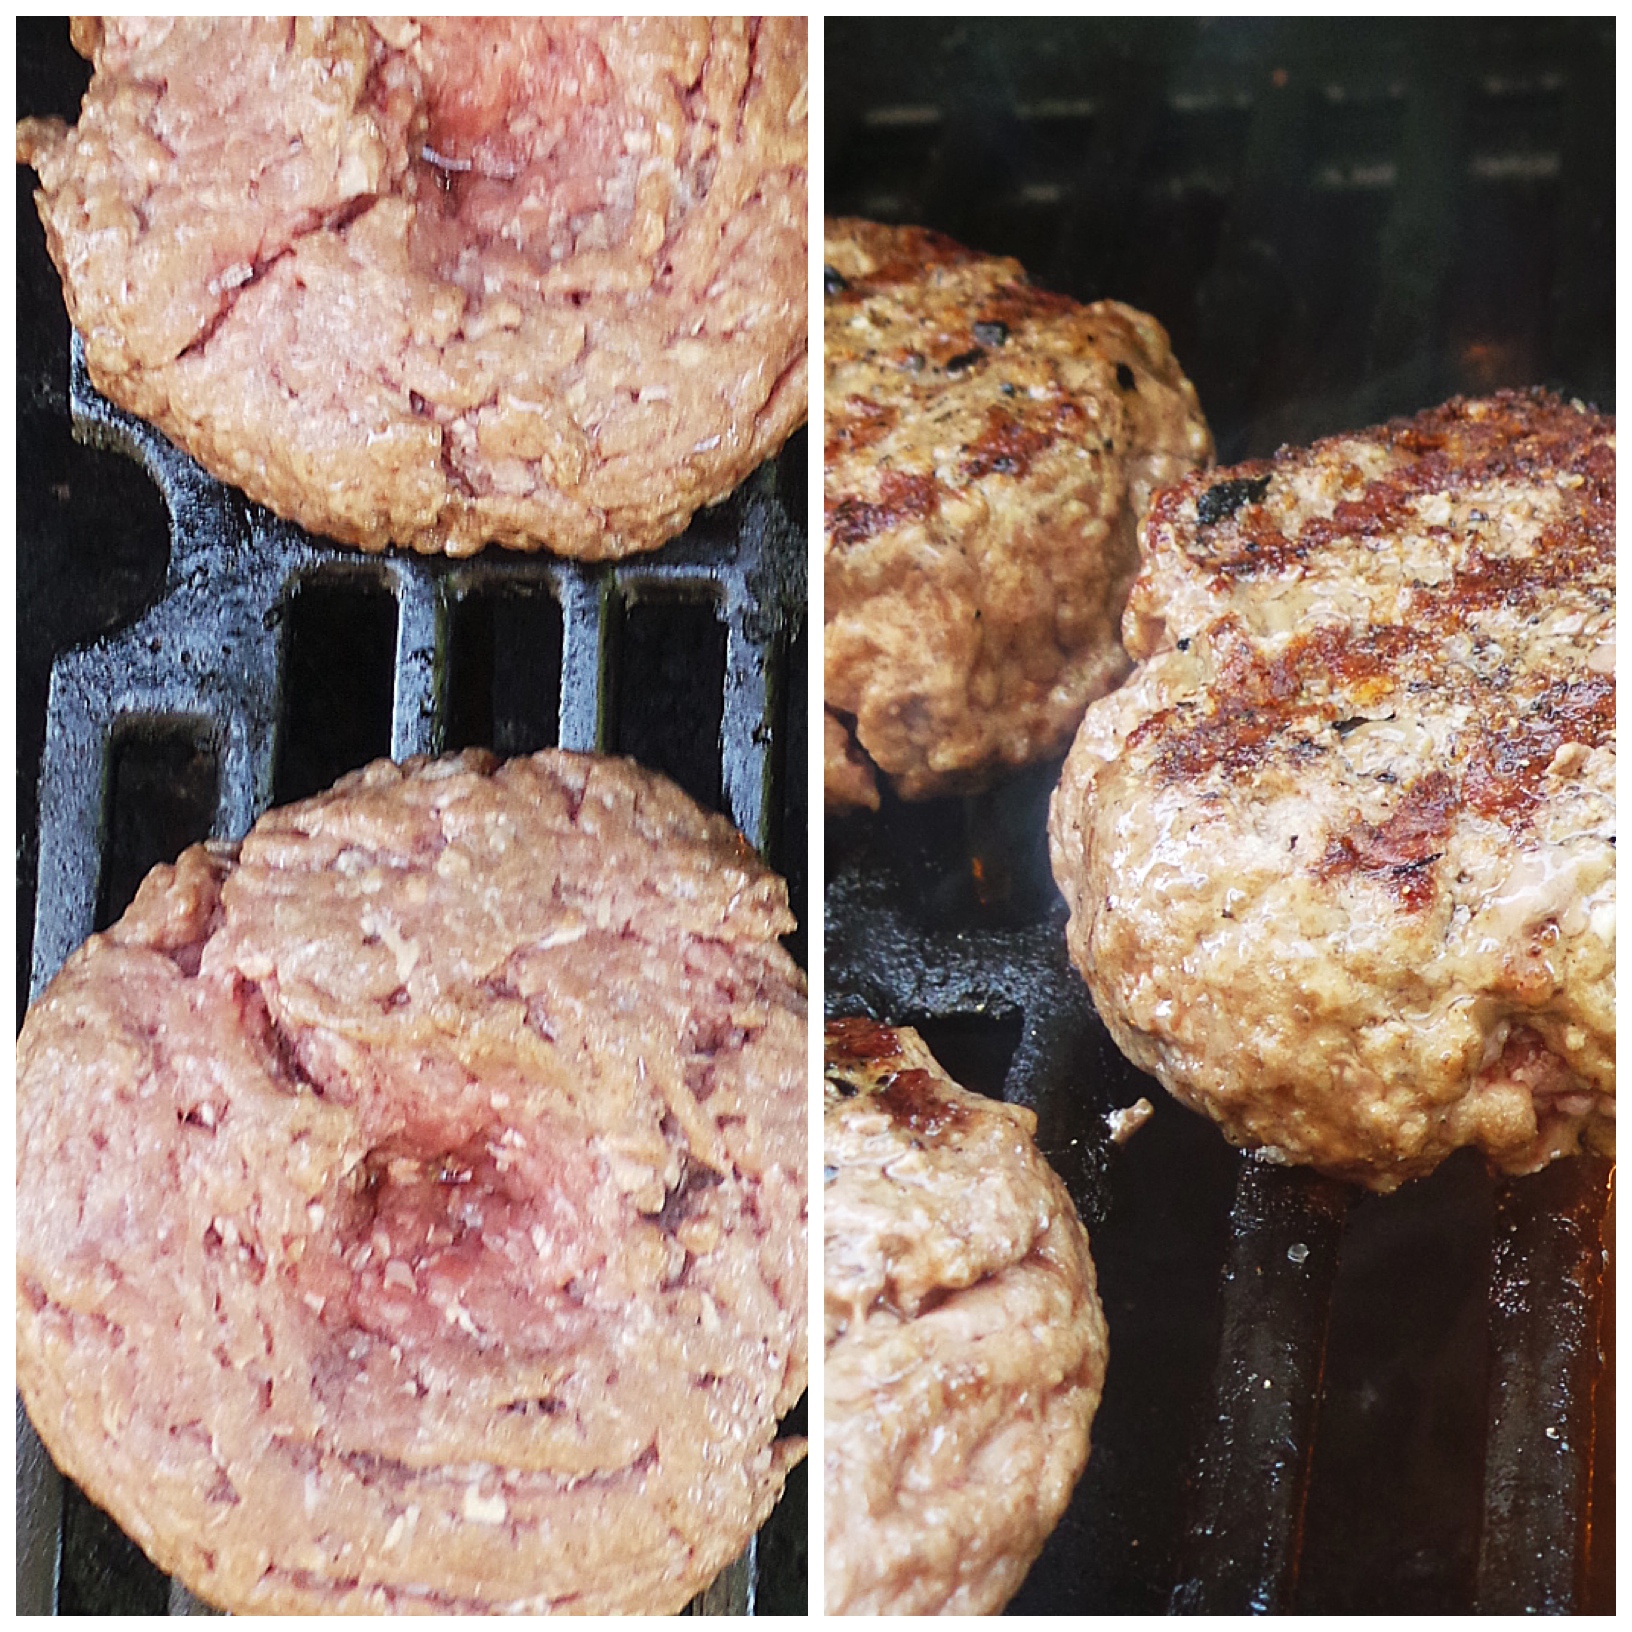 The juices will seep through which indicate your burger is cooking throughout. After 4 minutes I give mine a good flip. After one minute, I top it with cheese and let it cook another 2 minutes. This ensures me a medium burger every single time.
Basically, seasoning the burger last minute will not only give it a better flavor but a nice sear. Flipping once promises a juicer burger because the less handle, the less juices are lost. As for those who like to flatten their burgers on the grill, that does nothing but press out the juice. Don’t do that and next time you see someone do that, hit them with your spatula.
After the burgers are off the grill, let them rest a few minutes. In fact that’s when I put my buns on the grill. After they’re toasted the burgers will have rested two minutes and you’ll be ready to build!
Soon enough you will bite into a burger that will forever change your burger standards. No restaurant can top the way you now grill a burger.
- 1 1/2 lbs. ground beef 80/20
- olive oil
- salt and pepper
- Divide the burgers into four 6 oz. portions. Cuff patties in hand and loosely form patties.
- Using thumb, create indent in center of each patty.
- Chill in fridge for 30 minutes. This makes perfect time to get your desired toppings ready!
- Fire up the grill to medium high heat.
- Brush each patty with oil, then generously season with salt and pepper.
- Once the grill is hot, place down each burger and LEAVE ALONE!
- After 3-4 minutes on the grill, flip over once.
- After one minute on the opposite side, top with cheese and grill another 2-3 minutes for medium.
- Allow to rest a few minutes before building.
- Enjoy!
[shopeat_button]


